Fatal Baboons Controls
Movement, fightback, scrap UI, zone awareness, and what never to do with a Crown bag.
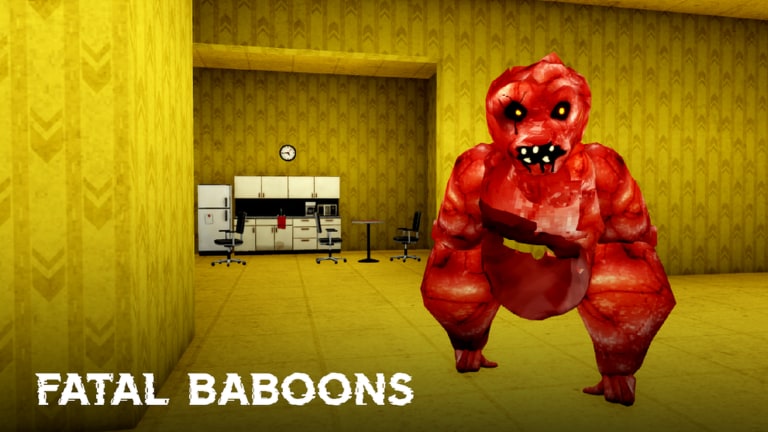
This Controls guide is the input and awareness cheat sheet for Fatal Baboons on Roblox. After the November 2026 New Lab revamp, most deaths still come from bad habits at the keyboard or thumbstick—not from missing lore. Master movement, camera, F fightback, the scrap carry UI, and Safe Zone versus Danger Zone borders before you chase Crown routes.
Fatal Baboons by VertexLabs is a survival-escape horror loop: leave a Safe Zone, scavenge scrap (max carry 6), sell at the Scrap Recycler next to Abby’s Shop, and survive Lab and Backrooms monsters with friends on servers sized for 20. Controls exist to keep that loop clean. If you still need the day-one story, start with Getting Started and return here when your fingers feel ahead of your brain.
Core movement (PC)
- WASD (or arrow keys) for walk movement.
- Sprint with the standard Roblox sprint bind (often Shift—confirm in your Roblox settings if it feels wrong).
- Space to jump. Jump clears low swings from threats like Brute and Bertha; it does not make you Meat-proof in Backrooms.
- Camera via mouse. Keep FOV comfortable; extreme zooms hide Mimic face checks and Spitter wind-ups.
- F for fightback when an eligible monster grabs you. Full rules live in Fightback.
Roblox accessibility and custom keybinds can remap some actions. Whatever you choose, keep F reachable without opening menus. Fightback windows are short; hunting a remapped key mid-jumpscare is how Crowns vanish.
Core movement (mobile / touch)
- Thumbstick for locomotion; keep it light when John is hunting sound.
- On-screen jump and sprint buttons—practice them in a Safe Zone before your first Danger Zone push.
- Pinch / drag for camera. On small screens, pause briefly in Safe Zones to reorient; do not spin the camera while standing on a painted border.
- Fightback still uses the on-screen F / fightback prompt when a grab is eligible. Thumb coverage matters: do not bury the prompt under your inventory finger.
Mobile players should favor shorter scrap loops. Multi-button juggling (sprint + camera + jump + prompt) under Spitter goo is harsher on touch than on mouse and keyboard. See Scrap Farming for short-loop design.
Inventory and scrap carry UI
Your bag is a hard system, not flavor text:
- You can carry at most 6 scrap.
- The UI shows how full you are—treat 5 and 6 as yellow and red alerts, not bragging rights.
- Crown scrap sells for 50 coins. When Crowns are in the bag, every extra second in a Danger Zone is a bet.
- Selling happens at the Scrap Recycler beside Abby’s Shop once you are safely across the border.
Do not open shop, cosmetics, or long chat panels while carrying unsold Crowns in a Danger Zone. Menu tunnel vision is a top-five wipe cause. Sell first; browse Abby’s catalog second.
Safe Zone vs Danger Zone awareness
Painted borders separate spaces monsters cannot enter (Safe Zones) from spaces where they hunt (Danger Zones). Control literacy includes reading those lines at a glance:
- Stop sprinting before you cross out if you need to check audio (John).
- Do not AFK straddling the line—panic friends and hitboxes create comedy deaths.
- After fightback, spend any immunity window running to paint, not to one more scrap pile.
- Call “crossing” in co-op so teammates do not assume you are still safe.
Zone awareness is half of Survive Monsters. Inputs without border literacy just help you die faster.
Camera discipline that saves runs
- Sweep corners before committing sprint.
- In Backrooms, keep Null on-screen when possible; stare rules beat raw speed.
- Face-check teammates before sharing Crown paths—Mimic reads as a player.
- Do not let friends body-block your view during a fightback QTE (Players etiquette).
Use the Monster Tier List and Monster Stats so you know which silhouettes deserve an instant camera snap versus a calm walk-away.
What NOT to do while holding Crown scrap
Treat this list as law when Crowns are in inventory:
- Do not open Abby’s Shop or cosmetic browsers in a Danger Zone.
- Do not teach a friend a new wing “real quick” with your own Crowns on board.
- Do not chase jumpscare angles or emote flexes for clips.
- Do not ride elevators into Backrooms without a watcher and a clear cabin.
- Do not stand still to type long explanations when pink John threat appears—silence first, chat later in Safe Zone.
- Do not mash random keys hoping fightback works on non-eligible grabs; look for the prompt, then press F.
- Do not trust unofficial scripts to “auto-sell” for you; learn the recycler path with your own hands.
Crown bags want boredom. Boring inputs print coins.
Fightback input under stress
When grabbed by an eligible threat (community focus includes Null, Bertha, and Meat):
- See the prompt.
- Press F / tap the fightback control.
- Complete the QTE punch.
- Sprint toward Safe Zone paint while any immunity (notably Null’s ~30 seconds) lasts.
- Sell or reset—do not greed.
Practice empty-bag grabs before staking Crowns. Details and misconceptions: Fightback.
PC vs mobile quick comparison
| Habit | PC tip | Mobile tip |
|---|---|---|
| Sprint control | Feather Shift near John | Ease thumbstick; avoid full-stick noise |
| Fightback | Keep F unbound from chat focus | Keep prompt finger free |
| Camera | Mouse flicks at corners | Reorient in Safe Zone more often |
| Menus | Keybind discipline | Close UI before crossing paint |
| Squad calls | Push-to-talk if you use voice | Prefire short text in Safe Zone |
Neither platform gets a monster AI discount. Skins and devices do not change hunt logic—only your timing does.
Training drills (15 minutes)
- Safe Zone only: walk, sprint, jump, camera sweeps—no scrap.
- Cross into a nearby Danger Zone empty-handed; return on purpose at the first audio spike.
- Pick to 3 scrap, sell, repeat—never touch menus mid-hall.
- One intentional eligible grab with empty bag; land fightback cleanly.
- Only then attempt a Crown-aware loop from Scrap Farming.
Related pages
- Getting Started — day-one loop
- Fightback — F-key mastery
- Survive Monsters — why you move the way you move
- Scrap Farming — when to stop looting
- Tier List — threat priority
- Monster Stats — speed context while fleeing
Clean controls will not make Fatal Baboons easy. They will make your deaths educational instead of embarrassing. Keep F ready, keep Crowns boring, and treat every painted border like a checkpoint—not a suggestion.
Frequently Asked Questions
Quick answers to the most common questions.
What are the main Fatal Baboons controls on PC?
Use standard Roblox WASD movement, sprint, jump, and mouse camera. Press F to fightback when an eligible monster grabs you.
How do controls work on mobile?
Move with the thumbstick, use on-screen sprint and jump, drag to look, and tap the fightback prompt when it appears. Prefer shorter scrap loops on touch.
What should I avoid while carrying Crown scrap?
Do not open shop or cosmetics menus in Danger Zones, do not teach routes with Crowns onboard, and do not chase clips. Sell at the recycler first.
Can monsters enter Safe Zones?
No. Painted borders mark Safe Zones monsters cannot cross. Use them to sell, shop, and reset camera or keybinds safely.
Does fightback use a special key?
Yes. Press F (or the on-screen fightback control) when grabbed by an eligible monster, then complete the QTE. See the Fightback guide for eligibility.